2013年2月27日水曜日

[TeX]数式文字列を png ファイルにして出力する

dvipng コマンドを使って TeX から作成した dvi ファイルを png に変換する
\documentclass[11pt,a4paper]{report}
\pagestyle{empty}
\begin{document}
$y = 2x$
\end{document}
ページ番号が入ると数式のみの出力とならないので \pagestyle{empty} を付ける

実行手順
$ platex y_2x.tex
This is pTeXk, Version 3.141592-p3.1.10 (euc) (Web2C 7.5.6)
 %&-line parsing enabled.
(./y_2x.tex
pLaTeX2e <2006/11/10>+0 (based on LaTeX2e <2005/12/01> patch level 0)
(/usr/share/texmf/tex/latex/base/report.cls
Document Class: report 2005/09/16 v1.4f Standard LaTeX document class
(/usr/share/texmf/tex/latex/base/size11.clo)) (./y_2x.aux) [1] (./y_2x.aux) )
Output written on y_2x.dvi (1 page, 260 bytes).
Transcript written on y_2x.log.

$ dvipng y_2x.dvi -T tight -o y_2x.png
This is dvipng 1.13 Copyright 2002-2010 Jan-Ake Larsson
[1] 
dvipng に -T tight オプションを渡すことで余白を削除して出力できる

出力結果


サイズを変更する
数式のサイズを変更する場合は
\documentclass[11pt,a4paper]{jsarticle}
\pagestyle{empty}
\begin{document}
$y = 2x$
\end{document}
出力手順
$ platex y_2xhuge.tex
$ dvipng y_2xhuge.dvi -T tight -o y_2xhuge.png
出力結果

[TeX]Command

フォーマット
\newcommand{\commandname}[number of arguments]{command text, using #1, #2 etc to denote arguments}
コマンド定義例
\RequirePackage{ifthen}
\newcommand{\weekday}[1]{%
  \ifthenelse{\equal{#1}{1}}{Monday}{}%
  \ifthenelse{\equal{#1}{2}}{Tuesday}{}%
  \ifthenelse{\equal{#1}{3}}{Wednesday}{}%
  \ifthenelse{\equal{#1}{4}}{Thursday}{}%
  \ifthenelse{\equal{#1}{5}}{Friday}{}%
  \ifthenelse{\equal{#1}{6}}{Saturday}{}%
  \ifthenelse{\equal{#1}{7}}{Sunday}{}%
}
tex ファイル中での使い方
weekday command: \weekday{3}\\

[TeX]行間

Section 前の行間を詰める
beforesection というコマンドを追加し、引数で詰める行間の幅 (上行との行間を縮める) を指定する
\documentclass[a4paper,9pt]{jsarticle}
\newcommand{\beforesection}[1]{
 \vspace{-#1mm}
}

\begin{document}
\section{第1章タイトル}
\noindent
第1章本文 \\

\section{第2章タイトル}
\noindent
第2章本文 \\

\beforesection{13}
\section{第3章タイトル -13mm}
\noindent
第3章本文 \\

\beforesection{8}
\section{第4章タイトル -8mm}
\noindent
第4章本文 \\

\end{document}
出力結果では 2 章の本文と 3 章のタイトルが行間を詰めて表示される。

部分的に行間を変える
minilinespace という環境を準備し、そこで囲まれている箇所は行間 3mm となるようにしている。
\documentclass[a4paper,9pt]{jsarticle}

\newenvironment{minilinespace}{
 \baselineskip = 3.0mm
}

\begin{document}
\noindent
ほげほげ \\
ほげほげ \\
ほげほげ \\ \\

\begin{minilinespace}
\noindent
ほげほげ ここから行間 3.0mm \\
ほげほげ \\
ほげほげ ここまで行間 3.0mm \\ \\
\end{minilinespace}

\noindent
ほげほげ \\
ほげほげ \\
ほげほげ \\

\end{document}
出力結果

[TeX] 途中で縦置き・横置きを変更する

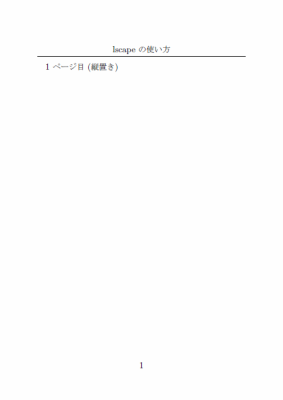
文章の途中で用紙の縦置き・横置きを変更するには lscape パッケージを使用する。
\documentclass[a6paper,9pt]{jsarticle}
\usepackage{lscape}
\usepackage{fancyhdr}
\pagestyle{fancy}

% ヘッダ・フッターの定義
\chead{lscape の使い方}
\cfoot{\thepage}

\begin{document}
1 ページ目 (縦置き)\\
\newpage

\begin{landscape}
2 ページ目 (横置き)\\
\newpage

3 ページ目 (横置き)\\
\newpage
\end{landscape}

4 ページ目 (縦置き)\\
\newpage

5 ページ目 (縦置き)
\end{document}
  • 最初に lscape パッケージを使用することを宣言し、横置きにしたい箇所 (ページ) を \begin{landscape} 〜 \end{landscape} で囲む。
  • Header, Footer (ページ番号など) は全て同じとなるため、上記の例では用紙縦置き方向の上下に配置される。
出力結果

[TeX]Header, Footer

\documentclass[a6paper,9pt]{jsarticle}
\usepackage{fancyhdr}
\pagestyle{fancy}

% ヘッダー・フッターの定義
\chead{ヘッダー・フッターテスト}
\cfoot{\thepage}

\begin{document}
\section{第一頁}
このページは 1 ページ目です。
\newpage

\section{第二頁}
このページは 2 ページ目です。

\end{document}
出力結果

[TeX]dvipdfm で紙サイズを指定して出力する

p オプションで出力紙サイズを指定できる
-p papersize Set papersize (letter, legal, ledger, tabloid, a6, a5, a4, a3, b6, b5, b4, b3, or b5var) [a4]
> dvipdfm -p a6 test.dvi

[TeX]Fedora で PNG 埋め込みの PDF を作成する

ebb コマンドの代わりにに ebbx、dvipdfm コマンドの代わりに dvipdfmx を使う
  1. ebbx コマンドで png ファイルから bbファイルを作成
  2. platex コマンドで tex ファイルから dvi ファイルを作成
  3. dvipdfmx コマンドで dvi ファイルから pdf ファイルを作成
    $ ebbx test.png
    $ platex test.tex
    $ dvipdfmx test.dvi
    test.dvi -> test.pdf