CSV ファイル読み込み
CSV ファイルを読み込むには csv モジュールを使用する。
Example: CSV 読み込みスクリプト (test00.py)
# -*- coding:utf-8 -*-
import csv

f = open("tokyo2010.csv", "rb")
reader = csv.reader(f)
for row in reader:
    print row

    try:
        temp = float(row[3])
        if temp >= 15:
            # 数値に変換して 15 ℃以上であれば表示
            print " ---> Over 15 degrees C (%.1f)" % temp
    except ValueError:
        # float 変換できなければこちらに入る
        print "Not float"

# 先頭に戻る
print "------------------------------------"
f.seek(0)
for row in reader:
    print row

f.close()
Example: csv ファイル (tokyo2010.csv)
Month,Ave. Atmosphere Pressure(hPa),Precipitation(mm),Ave. Daily Temperature(degree C),Ave. Humidity(%),Ave. Wind Speed(m/s),Sunshine Duration(h)
1,1010.2,9,7,41,2.7,221.9
2,1012.6,115,6.5,60,2.8,118.3
3,1012.7,143.5,9.1,61,3.2,139.8
4,1013.6,214,12.4,62,3.1,139.9
5,1007.3,114,19,60,3.2,198.8
6,1007.1,108,23.6,67,2.9,162.5
7,1005.9,70,28,70,3.3,182.7
8,1009.7,27,29.6,67,3.4,222.6
9,1008.3,428,25.1,68,2.9,165.3
10,1012.7,211,18.9,68,2.5,81.4
11,1012.3,94.5,13.5,56,2.4,158.9
12,1005.1,145.5,9.9,50,2.7,194.9
実行結果
$ python test00.py
['Month', 'Ave. Atmosphere Pressure(hPa)', 'Precipitation(mm)', 'Ave. Daily Temperature(degree C)', 'Ave. Humidity(%)', 'Ave. Wind Speed(m/s)', 'Sunshine Duration(h)']
Not float
['1', '1010.2', '9', '7', '41', '2.7', '221.9']
['2', '1012.6', '115', '6.5', '60', '2.8', '118.3']
['3', '1012.7', '143.5', '9.1', '61', '3.2', '139.8']
['4', '1013.6', '214', '12.4', '62', '3.1', '139.9']
['5', '1007.3', '114', '19', '60', '3.2', '198.8']
---> Over 15 degrees C (19.0)
['6', '1007.1', '108', '23.6', '67', '2.9', '162.5']
---> Over 15 degrees C (23.6)
['7', '1005.9', '70', '28', '70', '3.3', '182.7']
---> Over 15 degrees C (28.0)
['8', '1009.7', '27', '29.6', '67', '3.4', '222.6']
---> Over 15 degrees C (29.6)
['9', '1008.3', '428', '25.1', '68', '2.9', '165.3']
---> Over 15 degrees C (25.1)
['10', '1012.7', '211', '18.9', '68', '2.5', '81.4']
---> Over 15 degrees C (18.9)
['11', '1012.3', '94.5', '13.5', '56', '2.4', '158.9']
['12', '1005.1', '145.5', '9.9', '50', '2.7', '194.9']
------------------------------------
['Month', 'Ave. Atmosphere Pressure(hPa)', 'Precipitation(mm)', 'Ave. Daily Temperature(degree C)', 'Ave. Humidity(%)', 'Ave. Wind Speed(m/s)', 'Sunshine Duration(h)']
['1', '1010.2', '9', '7', '41', '2.7', '221.9']
['2', '1012.6', '115', '6.5', '60', '2.8', '118.3']
['3', '1012.7', '143.5', '9.1', '61', '3.2', '139.8']
['4', '1013.6', '214', '12.4', '62', '3.1', '139.9']
['5', '1007.3', '114', '19', '60', '3.2', '198.8']
['6', '1007.1', '108', '23.6', '67', '2.9', '162.5']
['7', '1005.9', '70', '28', '70', '3.3', '182.7']
['8', '1009.7', '27', '29.6', '67', '3.4', '222.6']
['9', '1008.3', '428', '25.1', '68', '2.9', '165.3']
['10', '1012.7', '211', '18.9', '68', '2.5', '81.4']
['11', '1012.3', '94.5', '13.5', '56', '2.4', '158.9']
['12', '1005.1', '145.5', '9.9', '50', '2.7', '194.9']
CSV ファイルへの出力
Example: CSV への出力スクリプト (test01.py)
# -*- coding:utf-8 -*-
import csv

f = open("out.csv", "wb")
writer = csv.writer(f)

row = ["Tokyo", 1, 7.0]
writer.writerow(row)
row = ["Tokyo", 8, 29.6]
writer.writerow(row)
row = ["Naha", 1, 16.8]
writer.writerow(row)
row = ["Naha", 8, 28.9]
writer.writerow(row)

f.close()
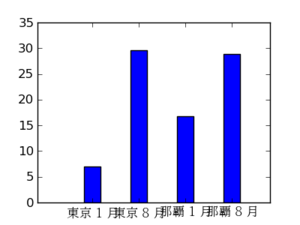
出力結果
Tokyo,1,7.0
Tokyo,8,29.6
Naha,1,16.8
Naha,8,28.9
改行コードを LF (\n) にする場合は cvs.writer() に lineterminator 引数で指定する。
writer = csv.writer(f, lineterminator="\n")